

In mid-2023, I received a call from a foundry manager in Malaysia. His voice was tense. “Our 3-tonne gas-fired reverb furnace is failing. The lining cracked after only 14 months. We have patches everywhere. The shell is getting hot. We need help before it fails completely.”
Fourteen months is nothing for a refractory lining. A well-installed and properly operated lining should last 5–8 years in an aluminium melting furnace. Something was wrong. Not with the refractory material itself. With everything around it.
I flew to Malaysia the following week. What I found was a textbook case of how a good lining can be destroyed by bad operation.
The Starting Point: A Lining Failing at 14 Months
The furnace was a 3-tonne gas-fired reverberatory furnace, used to melt ADC12 for automotive die casting. It ran two shifts per day, five days a week. The lining was a standard high-alumina castable, installed by a local contractor in early 2022.
The symptoms were clear:
Cracks: Vertical cracks up to 8 mm wide along the sidewall, especially near the burner port.
Patches: The maintenance team had applied refractory mortar at least six times.
Hot shell: Thermal imaging showed shell temperatures of 220°C in two areas — dangerously high.
Metal penetration: I could see aluminium staining in the cracks. That meant molten metal had already reached the shell.
The plant manager told me, “We bought the best refractory. We used a reputable contractor. Why did it fail?”
I told him: “The material was fine. The installation was probably fine. The operation is the problem.”
Step 1: Diagnosing the Root Cause
I spent the first day inspecting the furnace and talking to operators.
Inspection findings:
The burner flame was misaligned. It was hitting the sidewall, not the bath. The refractory near the burner port was overheated and eroded.
The furnace door seal was worn. Cold air was leaking in, causing thermal shock each time the door opened.
The metal level was often allowed to drop too low. The upper sidewall was exposed to direct flame radiation.
The heat-up schedule after the last repair was too fast. The operators had gone from cold to 720°C in three hours. The recommended schedule was eight hours.
Operator interviews:
They admitted charging wet scrap. The moisture caused steam explosions and thermal shock.
They regularly overcharged the furnace — filling to 95% capacity instead of 80%.
They had never received formal training on the furnace. They learned from each other.
That was the answer. The lining failed because the furnace was being operated outside its design parameters.
Step 2: Understanding Why the Lining Cracked
Refractory cracking in aluminium furnaces almost always comes down to one of four causes:
| Cause | How It Manifests | This Furnace |
|---|---|---|
| Thermal shock | Cracks from rapid heating or cooling | Yes — fast heat-up, wet scrap, door leaks |
| Flame impingement | Localised erosion near burner | Yes — misaligned burner |
| Metal penetration | Cracks filled with aluminium | Yes — found in sidewall cracks |
| Mechanical damage | Cracks from charging impact | Yes — rough charging practice |
This furnace had all four. That is why the lining failed so quickly.
The most serious was flame impingement. A misaligned burner creates a hot spot. The refractory in that area expands faster than the surrounding material. Cracks form. Metal penetrates. The crack grows. Eventually, the lining fails.
Step 3: Emergency Repair
The furnace could not be run safely with cracks that wide. We had to repair it before production could resume.
The repair procedure:
Shut down and cool slowly. We let the furnace cool naturally over 24 hours. Forced cooling would have caused more cracking.
Remove loose material. We used a chipping hammer to cut back to sound refractory. The cracked sections near the burner port were removed completely.
Clean the surface. Compressed air removed dust and metal debris.
Pre-wet the existing refractory. This prevents the new castable from drying too quickly.
Mix the castable. We used a low-cement, high-alumina castable with good thermal shock resistance. Water content was strictly controlled — no extra water to make it easier to pour.
Apply the castable. We troweled it into the repair area and vibrated it to remove air pockets.
Cure and dry. This is the step most people rush. We followed the manufacturer’s schedule: 24 hours at ambient, then 4 hours at 110°C, then 4 hours at 300°C, then 4 hours at 500°C.
Heat up slowly. After curing, we heated the furnace to 720°C over 10 hours. Not 3 hours. 10 hours.
The repair took four days. The cost was $4,200 in materials and labour.
I have written a detailed guide on how to diagnose and repair furnace refractory cracking. The principles are the same for any furnace.
Step 4: Fixing the Root Causes
Repairing the lining was only half the job. If we did not fix the causes, the new lining would fail in another 14 months.
Burner realignment:
The burner was misaligned. The flame was hitting the sidewall. We adjusted the burner position and angle. We also tuned the air-fuel ratio using a flue gas analyser. O₂ dropped from 7.5% to 3.2%. The flame became shorter and more intense — exactly what you want for aluminium melting.
Door seal replacement:
The door seal was worn flat. We replaced it with a high-temperature ceramic fibre seal. Cost: $180. The difference was immediate. The door area was cooler. Less heat loss. Less thermal shock.
Operating practice changes:
We trained the operators on three things:
Charge dry scrap only. We built a simple drying rack under a roof. Scrap must be dry before charging.
Do not overcharge. Maximum 80% of capacity. This reduces melt time and oxidation loss.
Follow the heat-up schedule. No shortcuts. The furnace is not a car. You cannot just turn it on and go.
We also implemented a simple daily checklist. Operators check flame colour, door seal, and metal level every shift.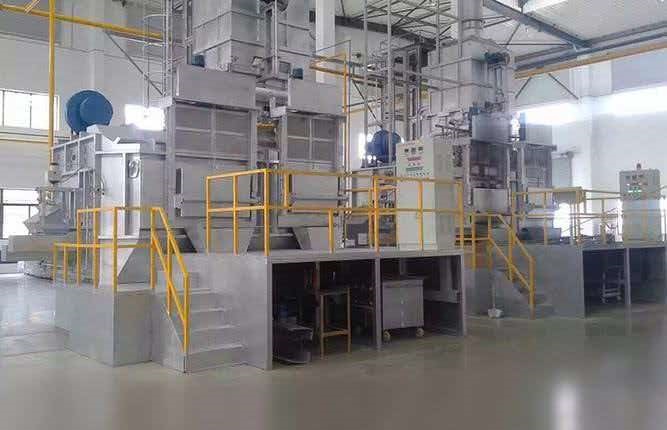
Metal level control:
We set a minimum metal level alarm. The furnace must never run with the upper sidewall exposed. This prevents flame radiation damage.
Step 5: Monitoring and Prevention
We installed a thermal camera check once per month. The maintenance team takes images of the shell and records hot spots. If a hot spot appears, they investigate immediately.
We also started a refractory crack log. Every week, the maintenance team measures any visible cracks. If a crack grows by more than 1 mm, they call me.
The cost of this monitoring is almost nothing. The value is enormous.
The Results After Six Months
| Metric | Before | After | Improvement |
|---|---|---|---|
| Lining age at failure | 14 months | — | — |
| Shell hot spots | 220°C | 85°C | Normal |
| Energy consumption | 890 kWh/t | 720 kWh/t | 19% reduction |
| Metal oxidation loss | 3.1% | 2.2% | 0.9% reduction |
| Unplanned downtime | 6 events/year | 0 | Eliminated |
| Repair cost | $4,200 | — | — |
| Annual saving | — | $68,000 | — |
The plant manager called me six months later. He said, “The lining is still perfect. The furnace runs better than it ever did. We should have called you two years ago.”
What I Learned — And What You Can Apply
This case is not unique. I have seen similar failures in Vietnam, Thailand, Indonesia, India, and China. The pattern is always the same:
Refractory failure is usually an operation problem, not a material problem. The best lining in the world will fail if the burner is misaligned and the operators charge wet scrap.
Thermal shock is the number one killer. Fast heat-up, wet scrap, and leaky doors all cause thermal shock. Control them.
Flame impingement destroys linings. Check burner alignment every month. It takes five minutes.
Metal penetration means the lining is done. Do not patch it. Replace it.
Training matters. Operators who understand why they do something will do it correctly. Operators who just follow orders will cut corners.
I have written a furnace maintenance checklist and a guide on how to diagnose and repair refractory cracking. Use them. They are free.
When to Call an Expert
You can inspect your own lining. You can measure cracks. You can check burner alignment. But sometimes an experienced eye finds things you miss.
The foundry in Malaysia had a maintenance team. They were competent. But they had never been trained on refractory failure analysis. They were patching symptoms, not fixing causes.
My fee for the site visit and repair supervision was $6,500. The annual saving was $68,000. That is a 10x return.
If your lining is failing early, and you cannot figure out why, call someone. Or use the checklists on this blog and do it yourself. Either way, do not wait.
Final Thoughts
A refractory lining should last 5–8 years. If it fails in 14 months, something is wrong. Find the cause. Fix it. Then repair the lining properly.
In my 25 years, I have seen linings last 10 years with good care. I have also seen them fail in 6 months with neglect. The difference is not the material. It is the attention.
Check your lining this week. Look for cracks. Measure them. Check the burner alignment. Check the door seals. If something looks wrong, act. A small repair today prevents a major failure tomorrow.
Internal links: How to Diagnose and Repair Furnace Refractory Cracking, Furnace Maintenance Checklist, How to Optimize Burner Efficiency in Gas-Fired Aluminium Furnaces
About the Author: Hu Shenyue is a veteran aluminium melting furnace expert with 25 years of hands-on experience in China, Southeast Asia, India, the UK, and Europe. He writes practical, experience-based content on furnace selection, maintenance, and optimisation at SmeltPro.